


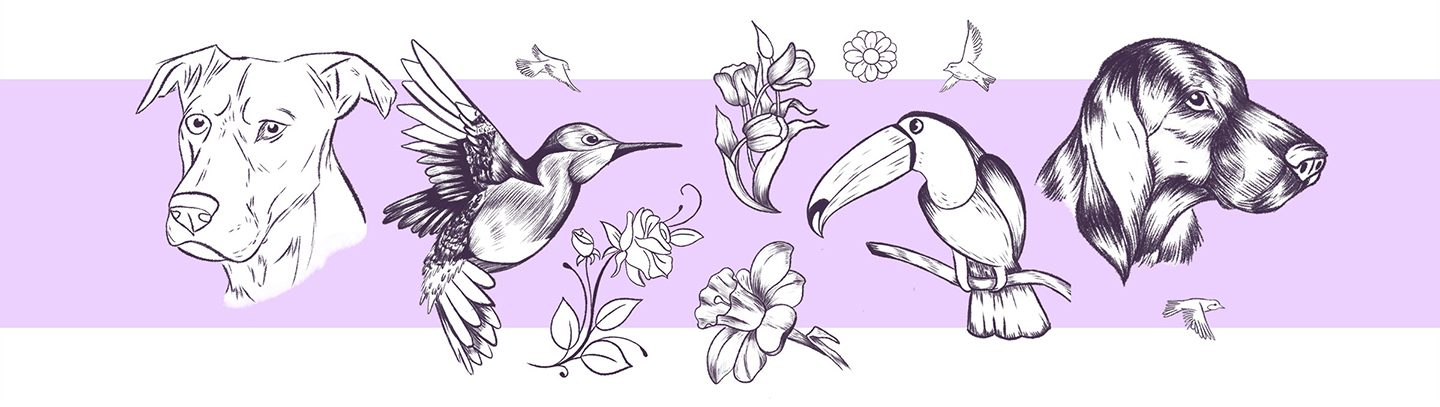
Mastering the art of drawing flora and fauna requires lots of practice and can be a lot of fun. It can be hard to capture animals on the page while out and about, so it’s advisable to try doing so from books, web searches or photos you’ve taken. Plants and flowers, meanwhile, make excellent still life studies, whether drawn inside or out.
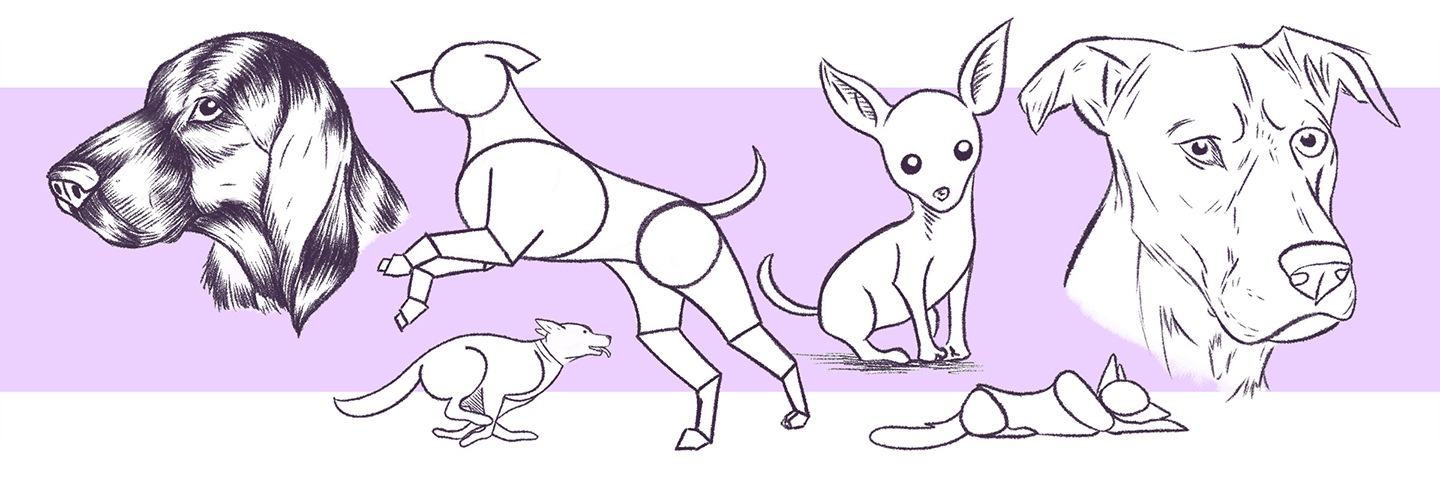
Learning how to draw a dog requires you to think about how to represent them using simple shapes. That means a basic circle for the head, a larger oval for the upper body and a smaller circle or oval for the rear. These should be connected by simple diagonal lines, with straight lines from the upper body for the front legs and curved lines from the back to represent the classic rear dog’s legs.
Once you’ve got the basic outline, try and get the ears in proportion, depending on whether you’re drawing the dog front on or in profile. Then it’s a case of refining lines on the back and face, adding curves and detailed lines to show off the muzzle, back and tail properly.

As with dogs, working out how to draw a cat is all about getting the shapes right before you move onto adding curves and shade. Firstly, you need to decide whether you’re drawing a cat walking or sitting. In both cases, use simple circles and ovals to represent the head and upper and lower body.
Look at photos of cats and cat skeletons to help you work out the structure. Focus on getting the curves on the back and legs right next, while ensuring the face and its features are in proportion. If the latter feels challenging, try using grid lines to get eyes, mouth and ears in the right place. These can be easily erased afterwards.

Any art historian will tell you that it took even the best artists years to work out how to draw a horse. Their muscular body and unique running style make them hard to capture, so it’s essential to follow some basic rules. Start with a waved line that runs convex from the top of the head, before becoming concave across the back and convex towards the tail. This represents the horse’s spine. Draw an oval directly beneath the middle of the back and a circle for the head. Overlapping ellipses should represent the chest and hindquarters, with a basic curve for the front of the neck. Add in a simple muzzle to the front of the head and simple legs and feet. From here you can refine and erase any lines and add facial features.
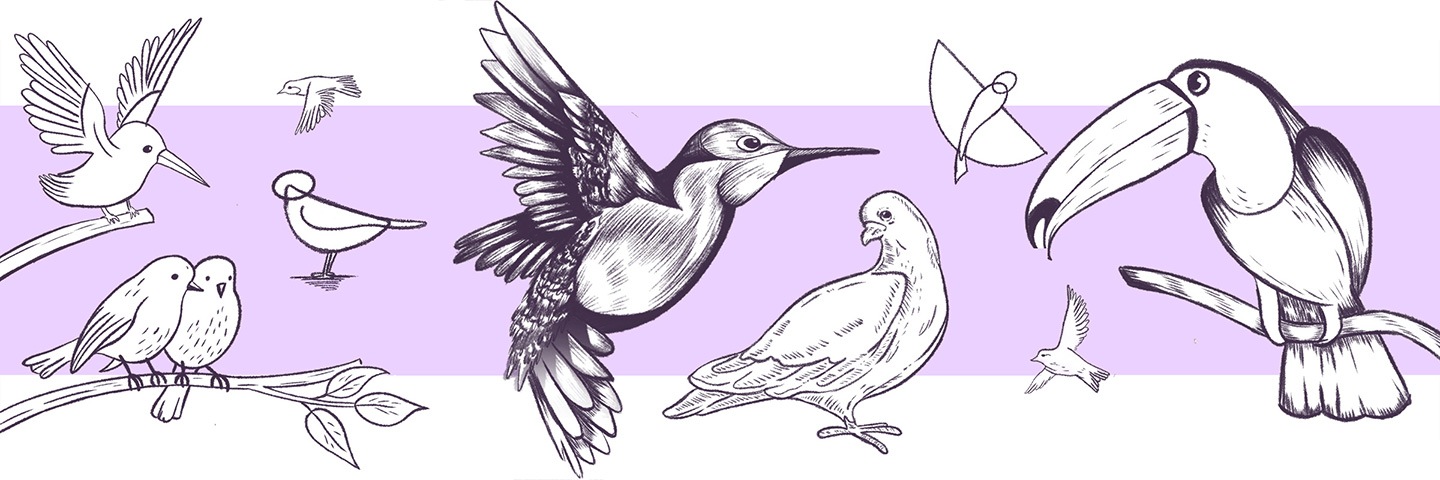
It’s easier to learn how to draw birds when they’re perched and still, rather than in flight. For this, use pictures of birds found online or in bird books. Use a diagonal line to show the bird’s posture, then an oval around this to represent its body. Put the head to the top of the line, overlapping the body, ensuring it’s in proportion. A straight line out from the head will give you scope for drawing a beak, with a similar line from the rear of the body acting as the tail. Add diagonal lines from the body to the tail to make the main shape look more birdlike, with curves between the body and head too.
Once you have this basic shape you can add detail to the beak, eyes and begin to add feathers. The latter will vary depending on what kind of bird you draw, so study images closely and keep practicing.
Dragons might not be real, but that doesn’t mean they’re not fun to draw. And while their mythical status is assured, you can take inspiration from nature when it comes to putting pencil to paper. As with dogs, start with two circles for the upper and lower body and a circle for the head, connected via two curved lines for a long neck. Use upwards curved lines that taper for the tail and an angled line from the upper body for the outline of wings. From here you can get creative, making the face scary or friendly depending on the personality you want to give your creation. Study the scales on reptiles to give the skin a realistic finish.
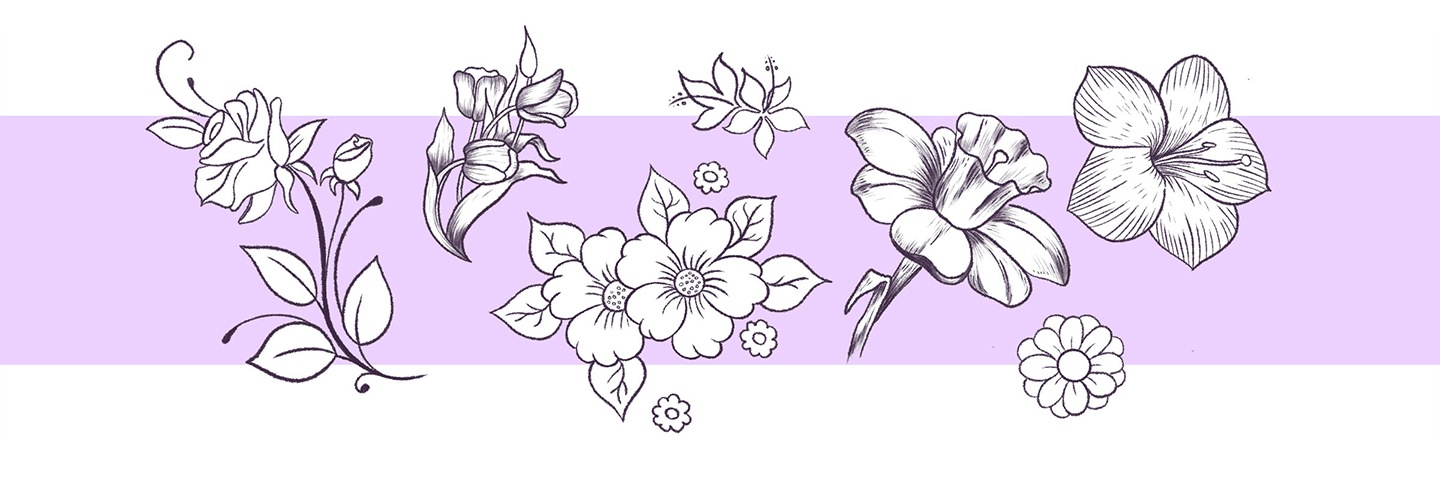
Learning how to draw flowers is something we try over and over as children. And that means they can be a great way to reignite a love of drawing. Keep things simple. Use a curved line to represent the stem, then a large circle for the outline of the flower itself. A smaller circle at the top of the stem should represent the center of the flower. It’s from here you can add petals, making sure they curve the right way depending on the angle you’re drawing from. Flowers with petals that rise around each other, such as roses, can be started with simple U shapes, with diagonal lines placed across the U to showcase detail.
It can be tempting to draw a tree in an overly simplistic style, making it look unrealistic in the process. While trees vary in shape, it’s important to start with a simple style to get to grips with the basics. Draw a trunk with a wide base that curves slightly inwards and then upwards. Add outlines of large branches, then add rough, scratched marks around these to represent leaves. You can then define branches using thicker pencils, ideally in places where there is no leaf cover. Use the same pencils to add rough bark and then harder pencils to make leaves look clearer.
Wacom One creates a pen-on-paper feeling, thanks to a 13.3” screen with natural surface friction and minimal reflection. The pen feels light and natural in your hand and transforms into a pencil, paintbrush or chalk in your selected software. It can even be used as an eraser. All you need for drawing realistic plants and animals. Creative software comes included, along with the ability to connect to your Mac or PC, as well as certain Android devices.
Recommended product

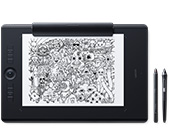
Wacom One 13
Draw, design and create directly on a high resolution screen with a precise pen.
The enhanced natural feel of Wacom Intuos makes drawing a pleasure. The accurate pen, with over 4,000 levels of pressure sensitivity allows you to capture details with precision and control. Wacom Intuos is really easy to use. Simply connect to your computer, as well as certain Android devices and set your imagination free.
Recommended product

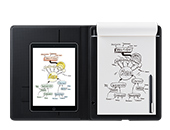
Wacom Intuos Bluetooth
Sketch, draw and edit images with a responsive pad, a precise pen, and see your creations appear on screen.
透過自然的介面技術讓人與科技緊密相依,是 Wacom 一貫的願景。這項願景讓 Wacom 成長為全球的互動式數位板、手寫液晶顯示器及數位筆的龍頭製造商,更是數位簽章保存與處理解決方案供應商。Wacom 直覺式輸入裝置的先進技術,已在全球各地造就出許多一流數位藝術、電影、特效、時尚及設計鉅作,其領先的介面技術同時為商業和家庭用戶提供表達自我個性的利器。創立於 1983 年的 Wacom 是全球性企業,總部位於日本(東京證券交易所股號:6727),分公司及行銷與銷售代表處遍佈世界各地 150 多個國家。