


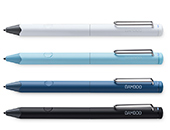


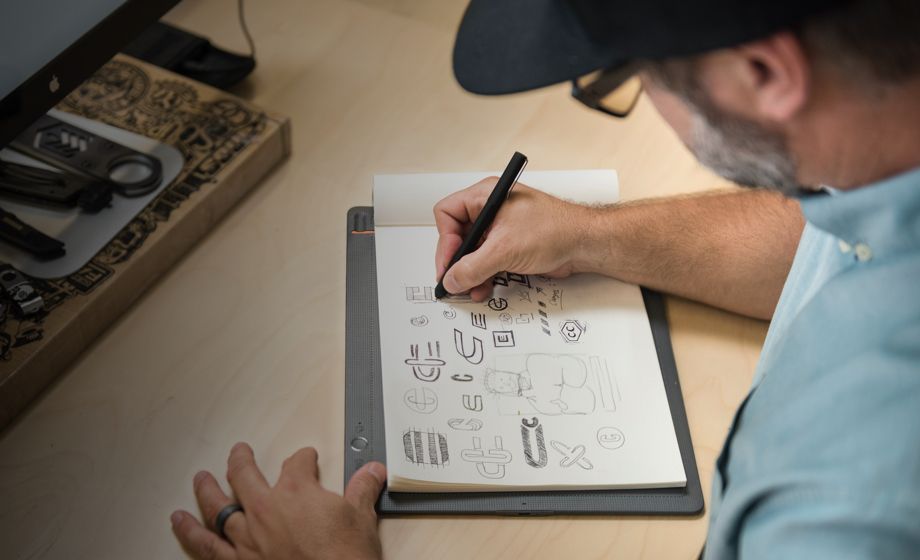
Pen tablets
Sketch, draw and edit images with a responsive pad, a precise pen and see your creations appear on screen.


Welcome to a tutorial on how to draw eyes. As usual, there isn’t just one single method of drawing anything. But, there are a few tips and tricks that can be very useful toward developing and improving your own technique and approach. I have summarized here as many of the tips as I could, and I’ll try to explain them in as enjoyably a way as possible.
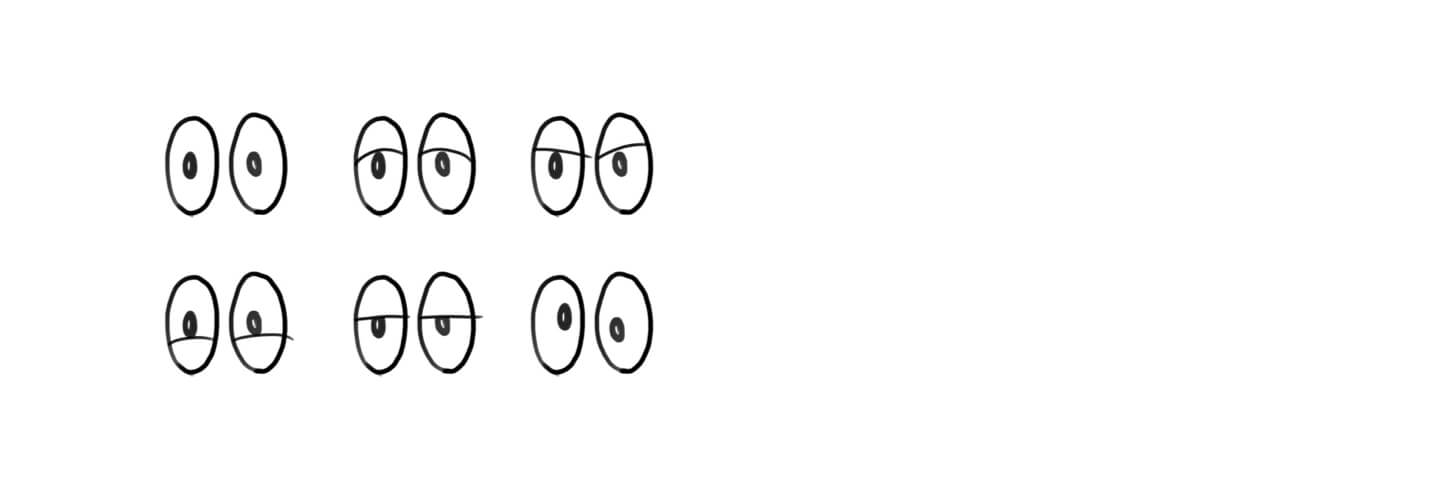
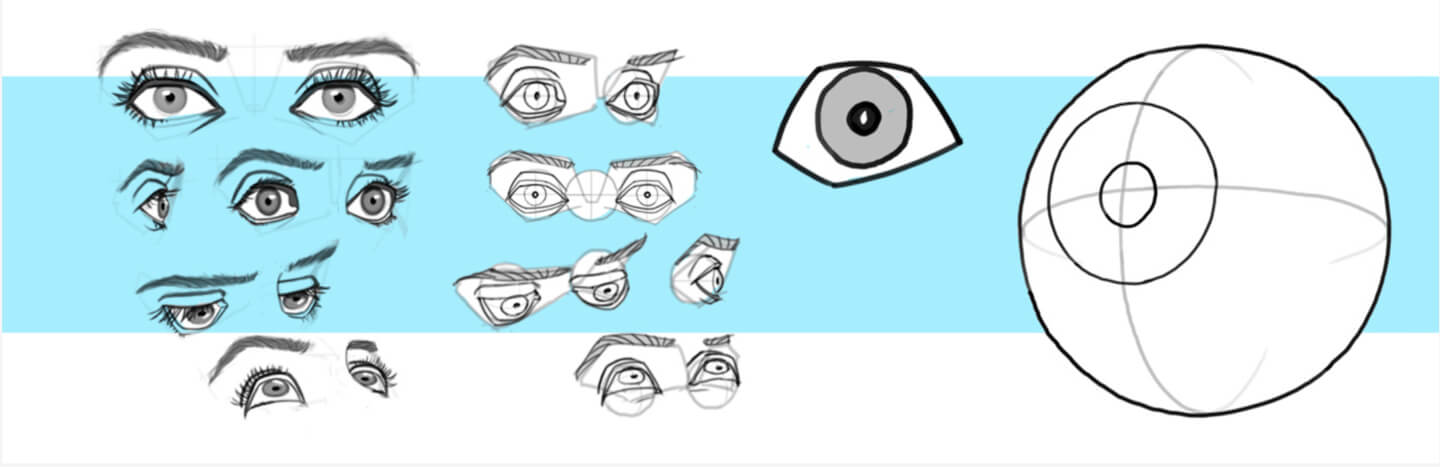
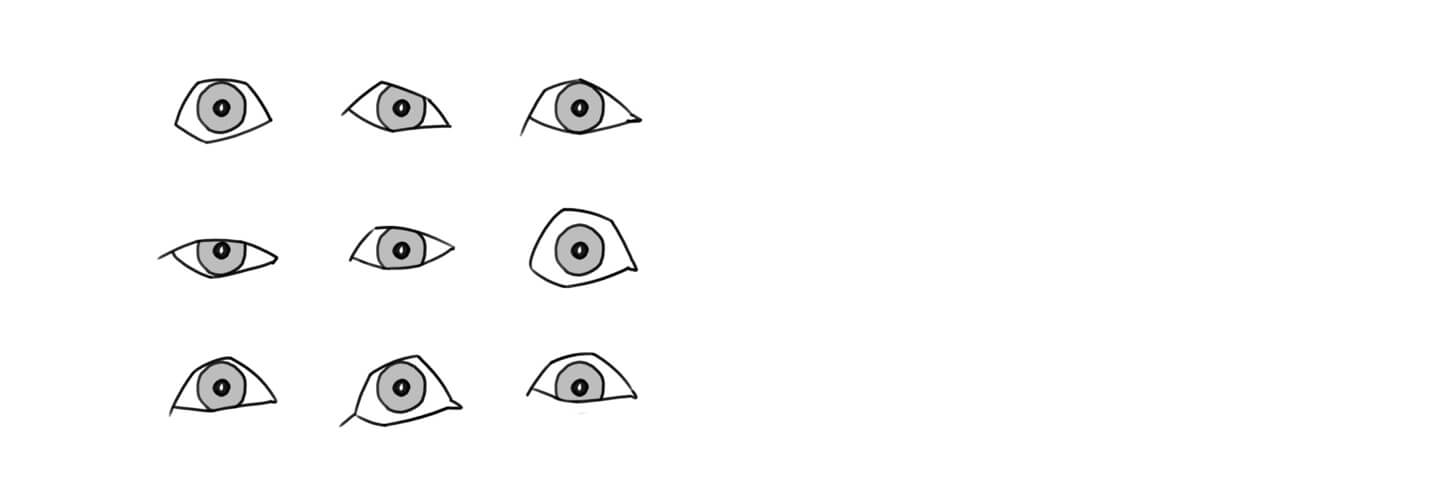
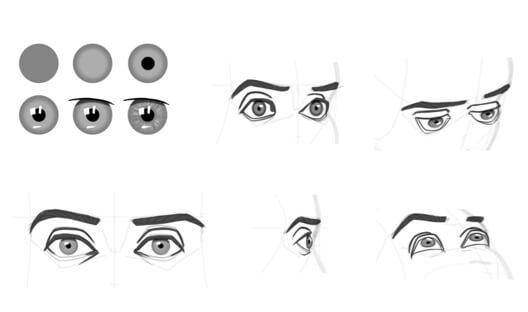
Everyone who has ever painted a face before has probably started by putting two dots or strokes for the eyes. After a few attempts, it probably turned into two circles with dots in the middle. This abstract representation actually sums up pretty precisely what eyes are all about: They are two spheres and each sphere has a pupil indicating the direction of vision. As a next step, we intrepid illustrators felt like we needed to express emotions through the eyes. So, we added an upper eyelid in the eye circle shape. We soon realized that downward pointing eyelids tend to look angry or evil, and upward pointing eyelids tend to look sad or meek.
There’s good reason that this basic type of eye representation is a cartoon, comics, and animation classic: These cartoon eyes can portray a pretty wide range of emotions. And if we look closer, it becomes obvious that cartoonists have given a lot of thought to the shape of the eyes - even if they choose what at first appears to be a simple form of representation. Let's keep that in mind as we explore the next steps.
First, let's try to understand the actual structure of the eye. Understanding the structure doesn't mean that every drawing has to have all the details of the eye. You will need to decide for yourself which details you want to emphasize, and which aspects you want to leave out. Your own style will develop out of these choices.
But now to the structure of the eyes:
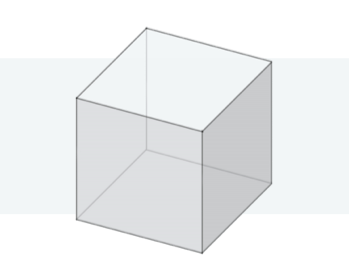
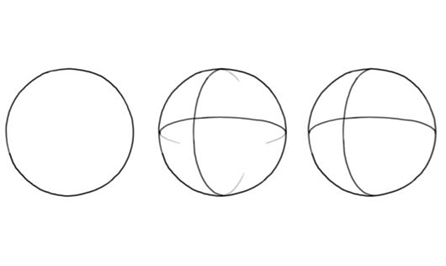
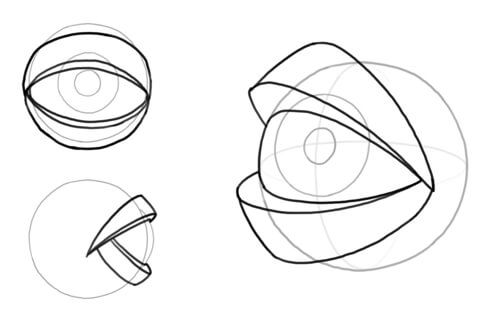
As we know, the eye is a ping pong ball sized sphere sitting inside the head. So, let's get started by drawing this sphere. By giving the sphere horizontal and vertical axes, we show that it is not merely a circle, but a 3-dimensional sphere that is, in this case, turned slightly to the left and up. When you draw in the two axes, make sure that they are ellipses that end at exactly half the height or half the width of the circle.
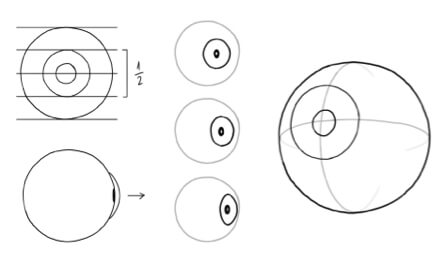
Viewed from the front, the iris is about half the size of the whole eyeball. The size of the pupil varies from person to person, and it also depends on the light situation and the mood. In addition, the iris is not painted flat onto the eyeball. Rather, it is raised a bit like a contact lens would be. When we draw an eye from the front, we don’t need to worry about this detail. But, the farther the eye is turned, the more prominent this iris “bump” becomes. Technically, the pupil is not actually a black dot, but a small hole through which light enters the eyeball. It is centered behind the iris lens, instead of on top of it. That's why when an eye looks to the side, you’ll move the pupil a little bit towards the center of the eye.
The picture shows the eye turned in three directions. Notice what happens to the iris and pupil:

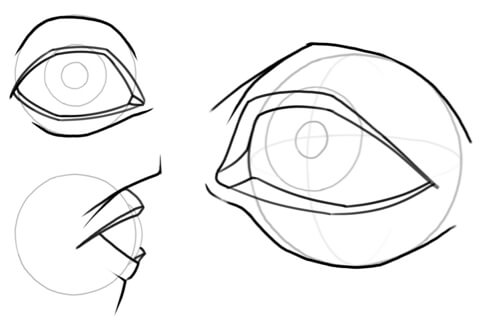
Next, we will look at the shape of what we artists actually mean by the "eye". What we are referring to is actually the opening through which a part of the eyeball peaks out - or the space between the edges of two eyelids. In principle, the edges of our eyelids are shaped like two flattened U’s turned inward toward each other. Let's look a bit more closely at the two U’s.
Even experienced drafters often take a moment to mentally plan before drawing the line of the upper eyelid in an expert sweep. This is because even a very slight deviation of this line can completely transform the expressions of the face. This trick will help: divide the upper eyelid into 3 sections. (By the way: this trick of dividing difficult lines into several sections doesn’t only apply to eyelids - any line can be pre-sketched in this way.) The lower eyelid can also be divided.
However, it is best to use only two strokes here instead of three. For some mysterious reason, the eye ends up looking more dynamic if we divide the top eyelid into three and the bottom only twice. Some artists do it the other way around, with two strokes at the top and three at the bottom. Try it out.
At the middle section of the eye - here on the right – you’ll see what is known as the tear duct.
It varies from face to face, and sometimes isn’t even there at all.
Now that we have pre-sketched the eye shape, we can either round off the corners of the subdivision lines a bit, or try drawing the two eyelid lines in two clean sweeps.
This 5-line concept offers a wealth of possible variations. Depending on the length ratio and angle of the lines, you can create very different types of eyes expressing a wide range of moods. Of course, these lines are primarily for pre-construction, and it is up to you in which style you want to continue with on your eyes. However, implementing the 5-lines concept can be a really interesting stylistic device..
Next, we should keep in mind that the two eyelids have a certain thickness too. On one hand, this makes the eyelids to protrude from the face a little farther than the eyeball when viewed from the side. On the other hand, a narrow edge will be visible all the way around, almost parallel to our 5 lines from before. If you might want to draw a crying eye at some point, you might be interested to know that tears collect on the narrow ridge of the lower lid. Neither area is always visible – it depends on whether we are looking at the eye from above or below, and on what the eye is doing.
The eyes – including the eyelids – can be constructed from every conceivable perspective in this way. Start with the sphere and imagine the eyelids wrapping around the sphere. Use the 5 lines to work out your basic shape. You will need to adjust the lengths and angles of your 5 lines depending on perspective. In some perspectives you may only need 2 or 3 of the lines because the rest are hidden behind the eyeball itself (e.g. in profile). At which points does the narrow area of the eyelids become visible? Which of the lines do you want to emphasize, which can be ignored? We will get into this in more detail below as we position the eyes on the face.
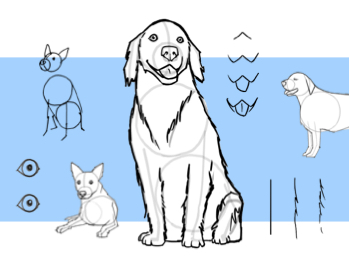
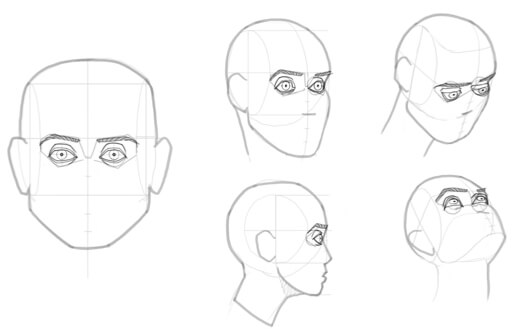
Now that we know all sorts of things about the eyes themselves, let's try to fit them into different headshapes. If you can already draw the headshape from different angles, then great! If not, I’d highly recommend the previous tutorial on "How to Draw a Human Headshape". I'll be using the same headshapes from that tutorial. These heads are a very handy starting point, but you don't necessarily need them.
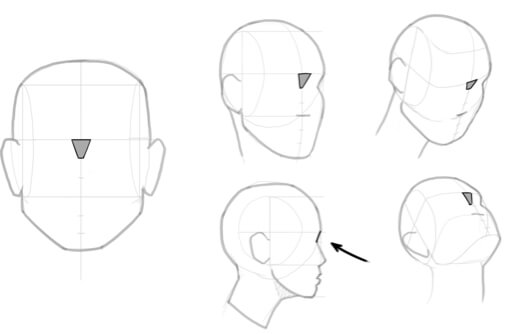
In order to define the eye area, I like to start with the small, almost triangle-shaped area above the nose. As you can see, the triangle shortens when the head is looking down and lengthens when looking up. In profile, The triangle seen from the side simply becomes a line.
By the way, when you draw the triangle onto your headshape, you can use the guides at the center-line of the headshape for easy orientation.
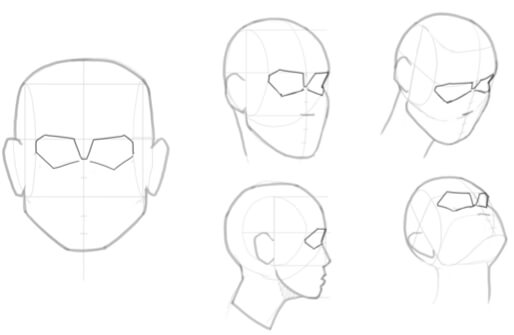
Next, and very simplified, we want to define the shape of the bones around the eye, because they are very important. They protect our eyes from blows and soccer balls. ;) The easiest way to define the bones around the eye is to use the Batman mask. Our triangle serves as a starting point here.
Just like our eyelid construction, the Batman mask consists of 3 lines at the top and 2 at the bottom. Each of the outer edges meets the cut out areas of our headshape exactly. When you transfer the Batman mask onto the tilted heads, notice what happens to the angles, and which lines appear shortened. In profile we can see only part of the mask, of course.
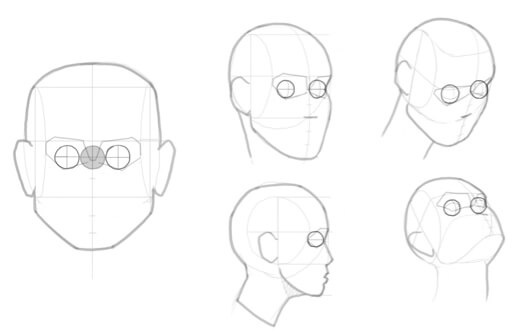
The eyeballs are obviously not glued onto the front of the face. Instead, they are located quite deep inside our head. Therefore, in placing our spheres into the Batman mask, we have to offset them a bit. How big the offset depends on the perspective. You can see this particularly clearly with the head tilted up. In profile we see this very easily. From the front, the depth of the eyeballs isn’t visible at first.
There is no general rule about how far apart the two eyeballs have to be. But if you are not sure, just think of a third sphere (or a little more) between the two eyeballs. This will give you a good distance.

Never underestimate the importance of what we learned earlier about the pupil and iris. Even a tiny bulge in the iris can enhance the realism of your eyes. From the front of course, you don't need to embellish. But as soon as the eye is not looking straight on at the viewer, remember to curve the iris and the deepen pupil.

Now let’s get to the eyelids. First, mark each of the two outer edges of your eyes level with the headshape guide lines. Then, draw in the pentagon. If you have already constructed the spheres neatly, everything else almost draws itself. Here again subtle changes to the angles and lengths on the sides can be made depending on how you’re viewing the headshape. When the views are pushed to extremes, the pentagon might also form interior angles, such as here in the picture with the two heads looking up and down respectively. In profile, the iris covers half the pentagon.
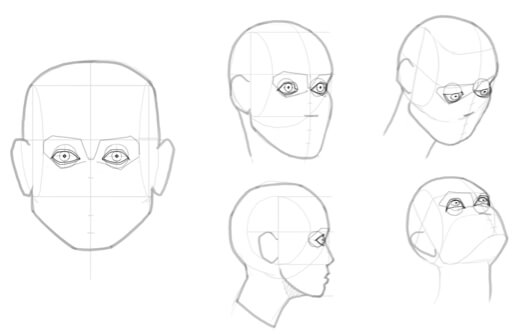
The second eyelid line is a nice way to emphasize the perspective you decided to depict the face from. Pay close attention to which parts of the narrow eyelid surfaces are facing the viewer. They will be thicker than the others. For example, with the head looking up, only the upper eyelid is visible. But then with the head turned to the side, different areas of the eyelid surfaces become visible around each of the eyes.
The two eyelid creases are the boundary between the eyelid and face. The upper crease in particular lends your eyes increased depth. Here, you can use the sphere as a guide. It's also worth holding on to the subdivisions from the eyelid design at this point. If you don't want your face to look old or tired, draw the lower eyelid crease a little softer and shorter than the upper. You can even hint at it just slightly.
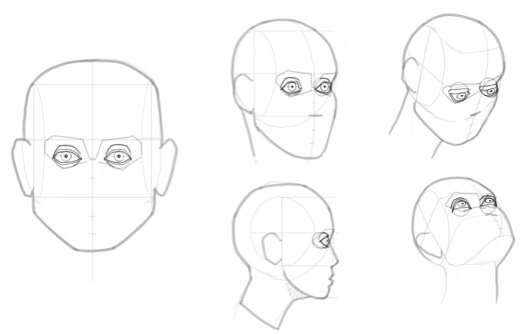
Eyebrows tend to express the mood of your face very clearly. In a neutral, resting state, the eyebrow starts at the top of the triangle, rises slightly, and then tapers down again. The edge of the eyebrow is again the cut out areas like in the original headshape design.
It's best to define the shape of the eyebrows with outlines first. This will simplify later steps. You can also indicate the direction of hair growth with small lines within the brow shapes. Start in the middle with steep lines, and flatten them out closer to the edges.

We can now finally harvest the fruits of our labor. From here on, your own style input is necessary. Every draftsperson has their own unique lines and handwriting. Maybe you’d prefer a more sketchy style, or maybe you want to start working with surfaces or colors straight away. Naturally, this is entirely up to you. From this point on, you have a ton of opportunities to develop your image. But since we're not talking about different styles or coloring in this tutorial, let's develop our eyes using entirely clean lines.
As you can see, the two upper eyelid lines can also be combined into a single thick line. This is especially true if you want to create a shadow. For the lower eyelid, it's a good idea to use the outlines a bit more sparingly, because usually shadows do not occur here when the light source is from above.
For the iris and pupil, I am going to give you a simple (but very effective) solution when using a graphic tablet: Reduce the opacity of your brush to about 30% in order to paint the iris. This is easier if you use a brush that is just a touch smaller than the iris itself. Next, let’s give the iris a little sparkle by reducing the brush size and hardness to lighten the center of the iris with white. Now you can fill the pupil in black. Of course, make sure that you offset it a bit from the center of the iris, depending on the view angle. Now you can use white again to set a light reflection point. Preferably, this will be slightly offset from the pupil. It doesn't always have to be a dot. You can experiment with different shapes. To add a final touch to the iris, show the shadow on the upper lid that it casts on the iris. And if you like, you can also throw in a little more detail to the structure of the iris by drawing (preferably on a separate layer) subtly alternating black and white lines from the pupil to the edge of the iris. But – just little tip – only make this effort if the eyes you are drawing are actually big enough to be able to notice this level of detail.

Eyebrows can go quite easily from being shapes that look painted-on to looking like actual eyebrows. And you can do this with the “Smudge” tool. In order to do this, always wipe in the same direction as the hair growth so the hard edges of your shapes deform into a light, zigzagged line. Be careful not to make the zigzags either too even or too messy. When you're satisfied with the result, lighten your zigzags a bit, and finish off the brows with some hair. The same fine line between order and chaos applies to hair. Draw the individual hairs with as quick strokes as possible. It’s best to use slightly curved lines that taper off and change direction often, while still paying attention to the direction of hair growth in the eyebrows.
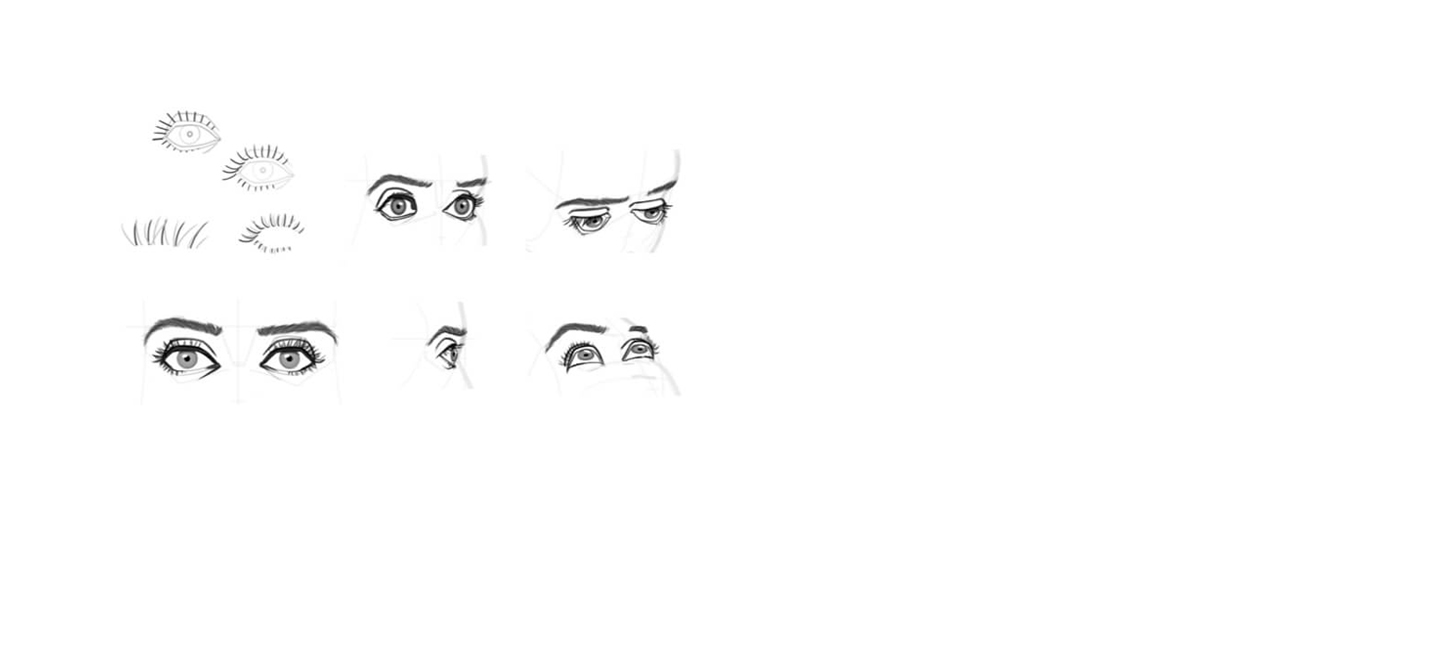
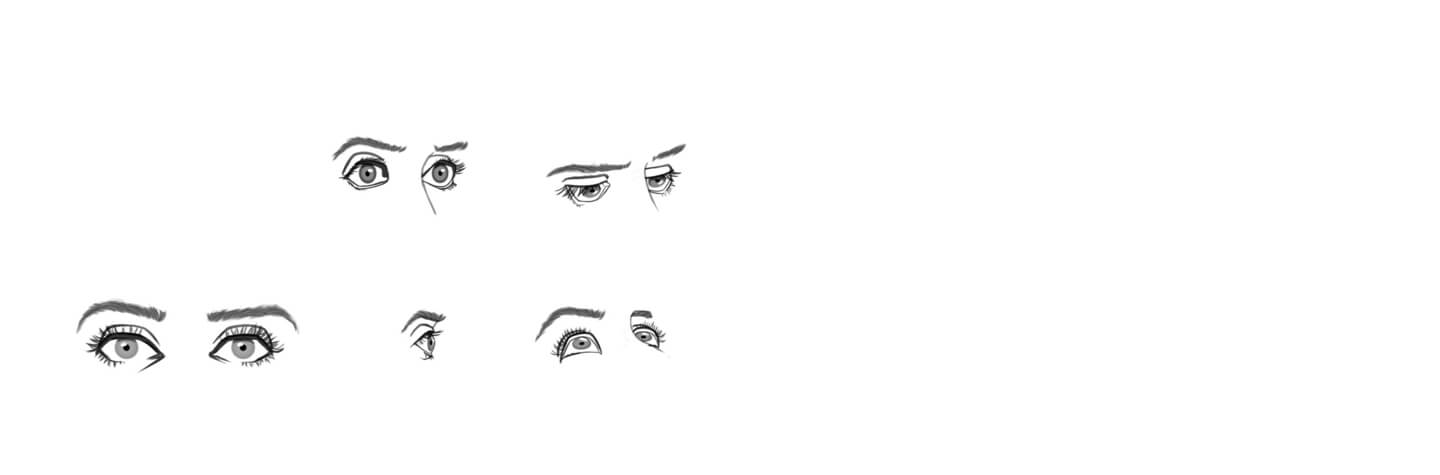
Last but not least, here’s a little challenge. Lashes will usually take a couple tries and a bit of practice. A few little tips might make this task a little easier: Eyelashes grow on the second (or outer) eyelid line. They tend to be longer towards the outer edge of the eye. The lower lashes are shorter than the upper ones and towards the middle they usually become quite fine, almost invisible. In addition, eyelashes are always curved. The direction of this curve is based on your perspective of the curvature of the eye. This means that the curve decreases towards the center of the eye, and that the eyelashes curve in opposite directions on both sides of the eye. That may sound really complicated, but it’s actually quite easy to understand from the picture.
When drawing eyelashes, it can be helpful to use a 2-step process: First, draw in only about ten lashes per eyelid. Take special care that all the eyelashes bend at the correct angle. And, pay attention to the lengths and allow them to taper just like the eyebrow hairs. In the second step, use the spaces between the initial lashes to insert the "chaos lashes" (shown here in grey). Vary the length and direction of curves slightly, and occasionally let several lashes come together to make little clumps.
Depending on how you turn your head, the direction of the lashes will change too. This may require a brief moment of spatial reflection. Take your time. Think carefully about where the eyelashes need to point.
This brings us to the end of a challenging tutorial. You needn’t internalize and apply everything we have done here immediately. But, you will find pretty much every tip that you need to draw eyes in this tutorial. You'll no doubt pick up one or two!
Have fun drawing, and see you soon!
Spoiler alert: Some of the eyes we so painstakingly just constructed will simply disappear behind the nose in the next tutorial.
Wacom One creates a familiar pen-on-paper feeling, thanks to a 13.3” screen with natural surface friction and minimal reflection. The pen feels light and natural in your hand and transforms into a pencil, paintbrush or chalk in your selected software. All you need for drawing realistic eyes. Creative software comes included, along with the ability to connect to your computer, as well as certain Android devices.

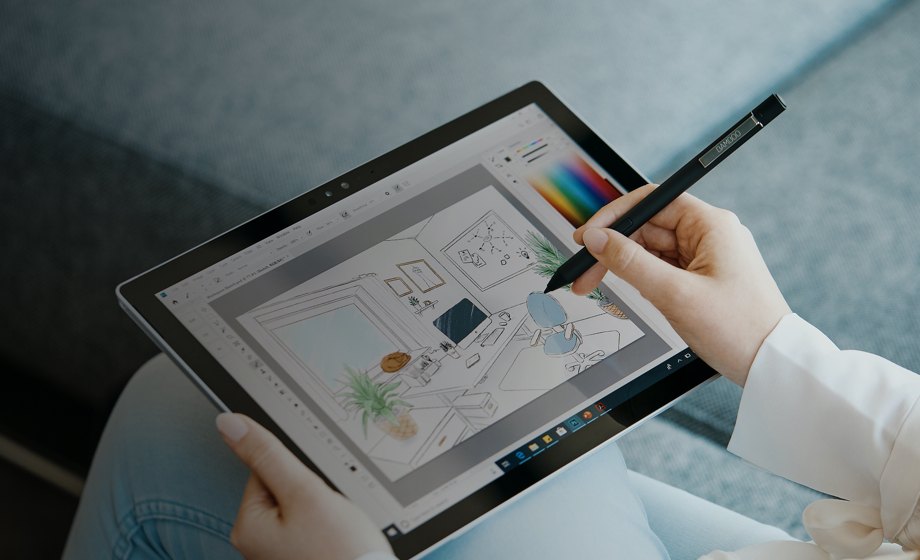
Wacom One 13 pen display
Draw, design and create directly on a high resolution screen with a precise pen.

Sketch, draw and edit images with a responsive pad, a precise pen and see your creations appear on screen.

Draw, design and create directly on a high resolution screen with a precise pen.
Wacom’s vision is to bring people and technology closer together through natural interface technologies. This has made it the world’s leading manufacturer of interactive pen tablets and displays as well as of digital styli and solutions for saving and processing digital signatures. The advanced technology of Wacom’s intuitive input devices has been used to create some of the most exciting digital art, films, special effects, fashion and designs around the world and provides business and home users with their leading interface technology to express their personality. Founded in 1983, Wacom is a global company based in Japan (Tokyo Stock Exchange 6727) with subsidiaries and affiliate offices around the world to support marketing and distribution in over 150 countries.