
![]()
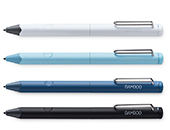
Smart Stylus für Handschriftliches, Notizen und Anmerkungen für Windows Ink. Richte deinen Bamboo Ink Plus mit diesen vier einfachen Schritten ein, oder schaue das Video an.


Hier erfährst du, wie du den Bamboo Ink in ein paar einfachen Schritten einrichtest und mit Windows Ink (der schnellen, einfachen Stifteingabe-Funktion auf deinem Windows 10-Gerät) loslegst.
![]()
Smart Stylus für Handschriftliches, Notizen und Anmerkungen für Windows Ink. Richte deinen Bamboo Ink Plus mit diesen vier einfachen Schritten ein, oder schaue das Video an.
Wenn du den neuesten Bamboo Ink (siehe Abbildung oben) besitzt, beginne mit der Einrichtung, indem du auf „Fortfahren“ klickst.
FortfahrenWenn du einen Bamboo Ink aus der vorherigen Generation besitzt (siehe Abbildung oben), beginne mit der Einrichtung, indem du auf „Fortfahren“ klickst.
Fortfahren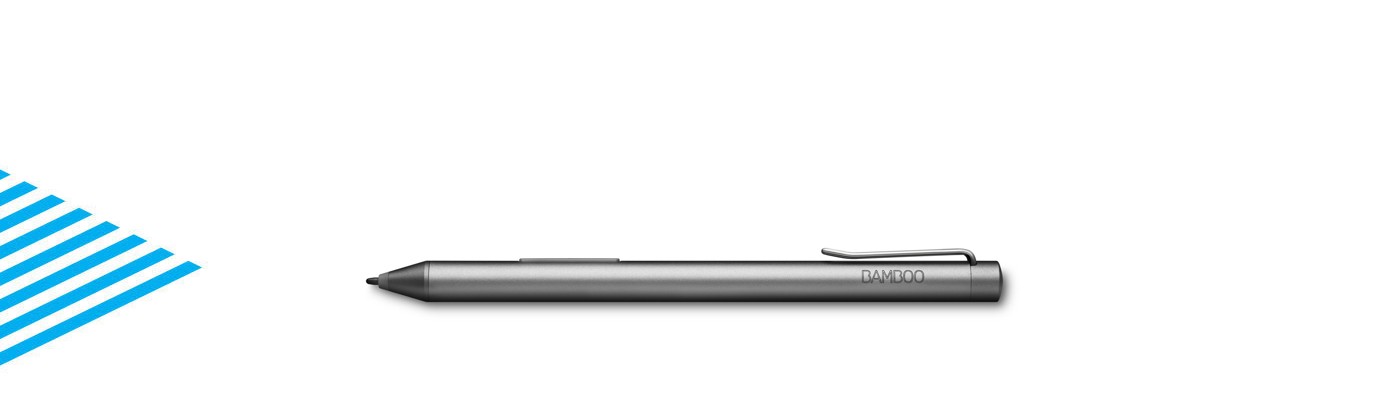
Überprüfe anhand der Liste getesteter Geräte auf dieser Seite, ob dein Windows-Gerät mit dem Bamboo Ink kompatibel ist.
Aktualisiere nach Möglichkeit den Treiber deines Windows-Geräts. Hier kannst du den Treiber „Bamboo Ink Stylus“ auf dein Gerät herunterladen. Bitte folge den Anweisungen auf dem Bildschirm.
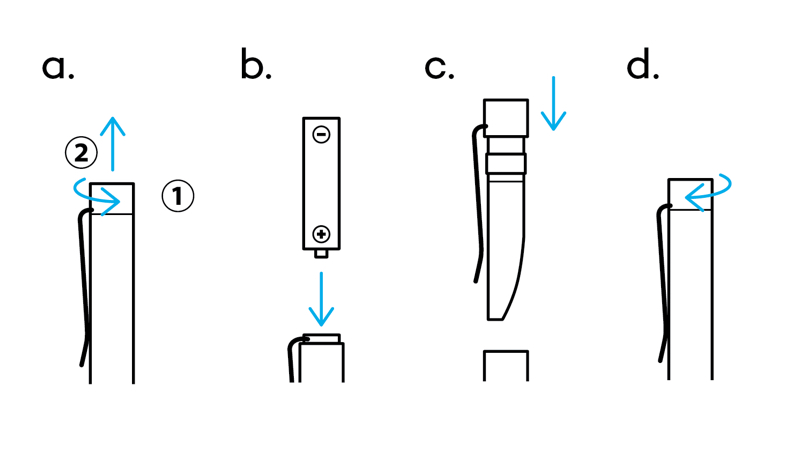
Drehe das obere Ende deines Bamboo Ink, um es zu lösen. Öffne den Stylus und setze die Batterie wie in der Abbildung ein. Drehe dann das obere Ende wieder auf den Stift.
Lege die Batterie mit dem Minuspol (–) nach oben ein.
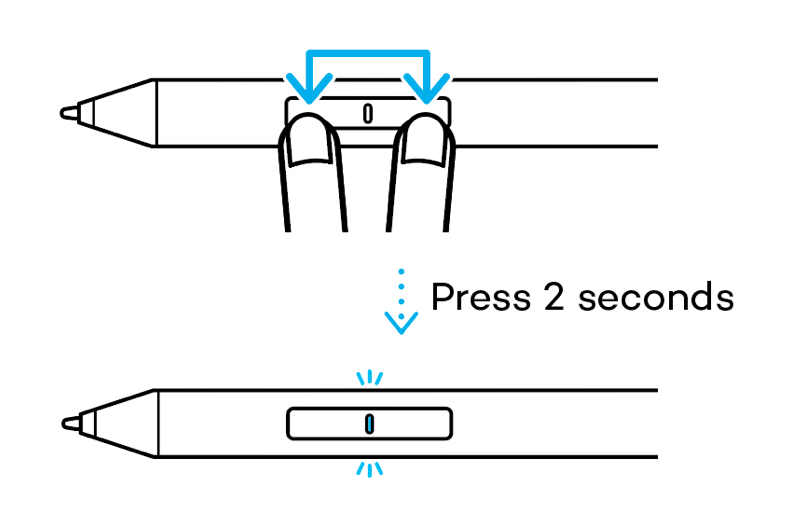
Dein Bamboo Ink unterstützt zwei Protokolle. Der Stift muss auf das Protokoll deines Windows-Geräts eingestellt werden. Falls der Stift auf deinem Gerät nicht funktioniert, kannst du den Modus schnell und einfach umschalten.
Wenn du zum anderen Protokoll wechseln möchtest, halte die beiden Seitenschalter zwei Sekunden lang gedrückt, bis die LED blinkt. Soll wieder das vorherige Protokoll gelten, wiederhole diesen Schritt.

Überprüfe anhand der Liste getesteter Geräte auf dieser Seite, ob dein Windows-Gerät mit dem Bamboo Ink kompatibel ist.
Bei einigen Geräten ist ein Update des Treibers erforderlich. Ob dein Gerät dazugehört, erfährst du in der nachstehenden Liste. Wenn dein Gerät dort nicht aufgeführt ist, kannst du mit Schritt 2 fortfahren. Sollte dein Gerät auf der Liste stehen, klicke hier, um den Treiber „Bamboo Ink Stylus“ auf dein Gerät herunterzuladen. Speichere die Datei auf deinem Gerät und öffne sie dann per Doppelklick, um den Treiber zu installieren. Befolge dazu die Anweisungen auf dem Bildschirm.
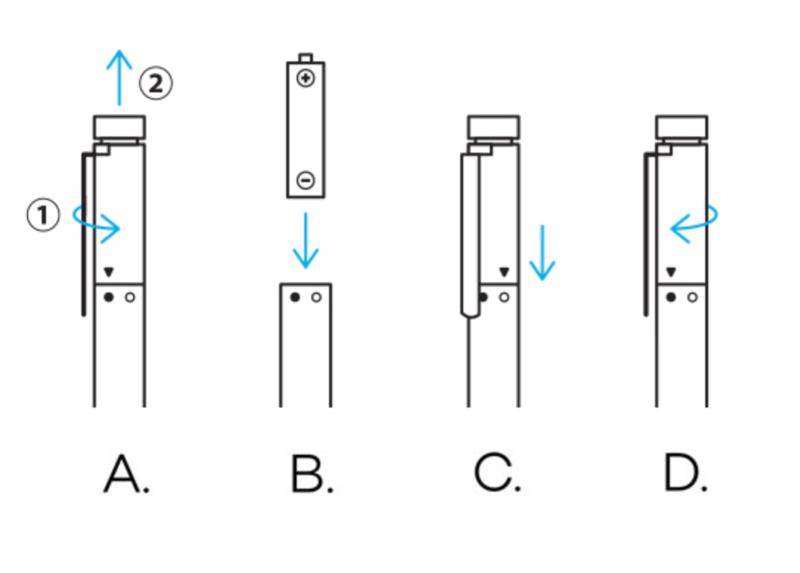
Drehe das obere Ende deines Bamboo Ink, um es zu lösen. Öffne den Stylus und setze die Batterie wie in der Abbildung ein. Drehe dann das obere Ende wieder auf den Stift.
Dein Bamboo Ink unterstützt zwei Kompatibilitätsmodi. Der Modus muss mit dem deines Windows-Geräts übereinstimmen. Wenn der Stylus nicht mit deinem Gerät funktioniert, kannst du den Modus ganz einfach ändern.
Halte beide Seitentasten gleichzeitig zwei Sekunden lang gedrückt, um von einem Modus zum anderen zu wechseln. Wiederhole dies, um zum vorherigen Modus zurückzukehren.
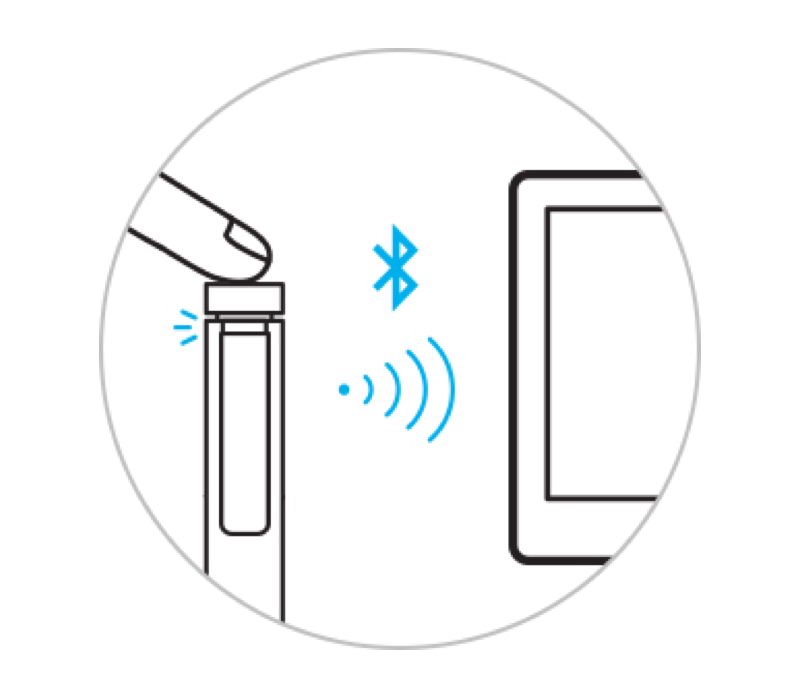
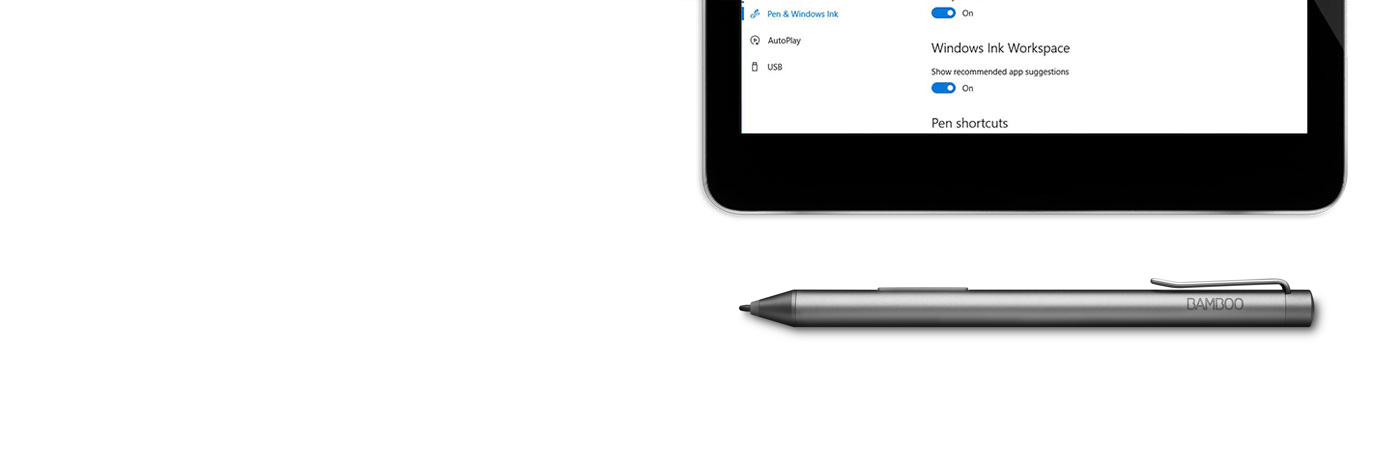
1. Klicke auf deinem Windows 10-Desktop auf „Start“ und öffne die Einstellungen. Aktiviere hier unter „Geräte“ Bluetooth.
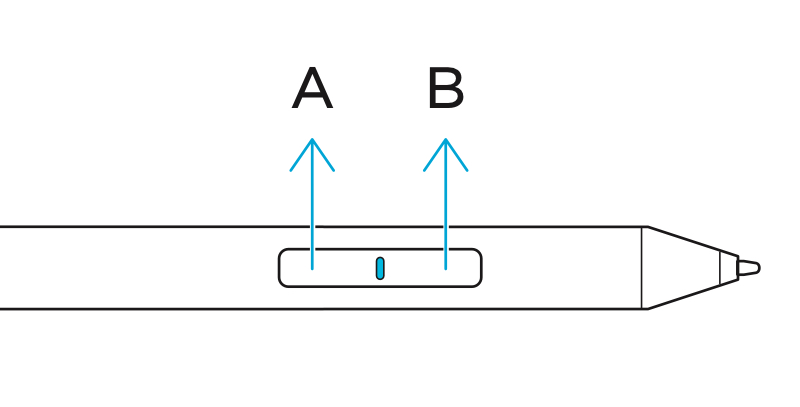
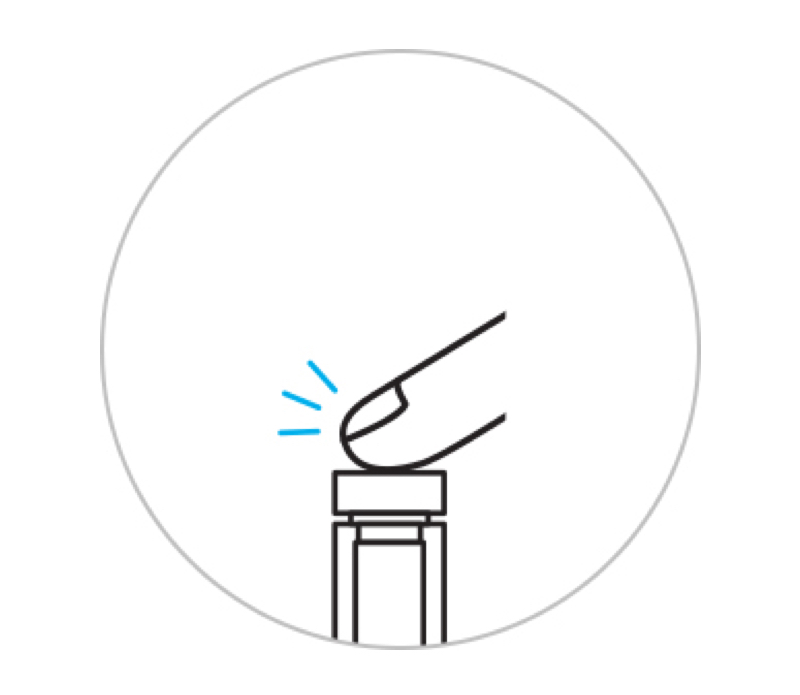
2. Nimm jetzt deinen Bamboo Ink und halte die Taste am oberen Stiftende ca. sechs Sekunden lang gedrückt, bis die LED anfängt zu blinken.
3. Wähle in der Liste der gefundenen Geräte den Bamboo Ink aus und klicke auf „Koppeln“.
Drücke die Taste am Stiftende einmal, um den Windows Ink-Arbeitsbereich zu öffnen.
Drücke sie zweimal, um Screen Sketch zu starten.
Halte die Taste gedrückt, um Sticky Notes zu öffnen.
Die Standardeinstellungen kannst du ganz nach Belieben ändern. Gehe dazu über „Start“ zu den Einstellungen und passe in „Geräte“ die Funktionen deines Bamboo Ink unter „Stift & Windows Ink“ an.

Zubehör (separat erhältlich): Stiftspitzen-Set (weich, mittel und fest) für jede Arbeitsweise.
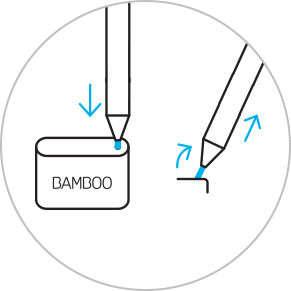
Wenn du die Stiftspitze wechseln möchtest, musst du diese nur in das kleine, in das Stiftspitzen-Set integrierte Loch stecken. Neige den Stift und ziehe die Spitze heraus.

Schiebe das Stiftspitzen-Set auf und wähle die gewünschte Spitze, von links nach rechts: fest (schwarz), mittel (grau) oder weich (schwarz).

Drücke die gewählte Spitze vorsichtig in den Stift. Achte darauf, dass sie richtig sitzt.
Kurznotizen, Skizzenblock, Bildschirmskizze: Im Windows Ink-Arbeitsbereich sind drei Apps vorinstalliert, mit denen du deine Ideen mithilfe des Bamboo Ink gestalten und weiterentwickeln kannst.
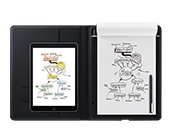
Bamboo Paper verwandelt dein Mobilgerät in ein Notizbuch. Halte deine Gedanken und Ideen, Notizen, Skizzen und Zeichnungen so einfach und direkt fest wie in einem echten Notizbuch aus Papier.
Sticky Notes, Sketchpad, Screen Sketch: Im Windows Ink-Arbeitsbereich sind drei Apps vorinstalliert, mit denen du deine Ideen mithilfe des Bamboo Ink gestalten und weiterentwickeln kannst.
Bamboo Paper verwandelt dein Mobilgerät in ein Notizbuch. Halte deine Gedanken und Ideen, Notizen, Skizzen und Zeichnungen so einfach und direkt fest wie in einem echten Notizbuch aus Papier.
Alle Wacom Produkte können sicher mit 70–75%igem Isopropylalkohol (Reinigungsalkohol) und einem weichen, fusselfreien Tuch gereinigt werden. Die harten, nicht-porösen Oberflächen Ihres Wacom Produkts (wie Display und andere äußere Oberflächen) mit dem feuchten Tuch abwischen. Keine Bleichmittel verwenden. Keine Feuchtigkeit in Öffnungen jeglicher Art gelangen lassen und das Wacom Produkt in keinerlei Reinigungsmittel tauchen. Unten finden Sie weitere Tipps – alternativ können Sie Ihr regionales Wacom Kundenserviceteam kontaktieren.

Das Stiftspitzen-Set für den Bamboo Ink mit drei Spitzen - in weich, mittel und fest - ermöglicht ein individuelles, authentisches Schreibgefühl auf dem Bildschirm, das du an deinen persönlichen Schreibstil anpassen kannst.