


![]()
A smart stylus for writing, note-taking and annotating, for Windows Ink. Follow these 4 easy steps to set-up your Bamboo Ink. Or see the video here.


Here’s an easy step-by-step guide on how to set up Bamboo Ink and get started with Windows Ink (the quick and easy pen-driven feature on your Windows 10 device).
![]()
A smart stylus for writing, note-taking and annotating, for Windows Ink. Follow these 4 easy steps to set-up your Bamboo Ink. Or see the video here.
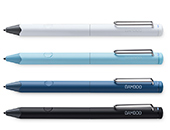
If you have the newest Bamboo Ink, pictured above, begin your set up by clicking below.
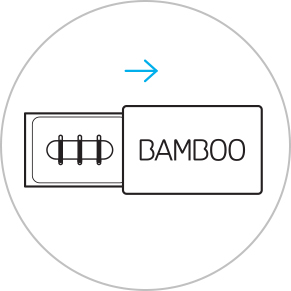
Continue hereIf you have the previous generation Bamboo Ink, pictured above, begin your set up by clicking below.
Continue here
To check if your Windows device is compatible with Bamboo Ink, see the list of tested devices on this page.
For best experience, we recommend you to update the driver of your Windows device. Click here to download the “Bamboo Ink stylus” to your device. Please follow the on screen instructions.
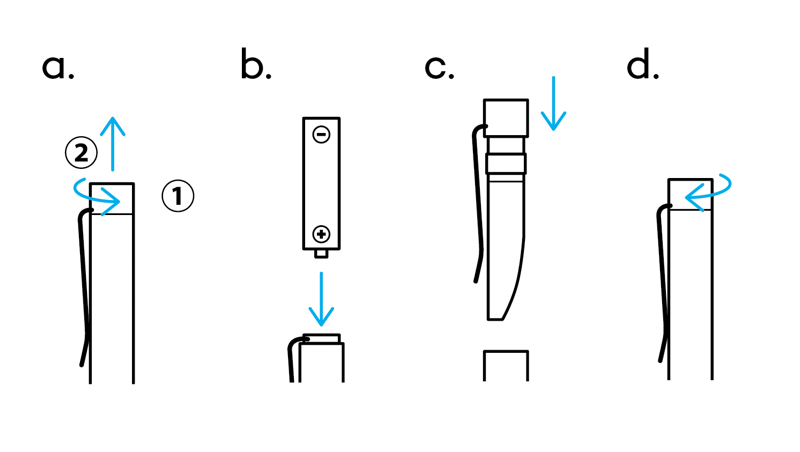
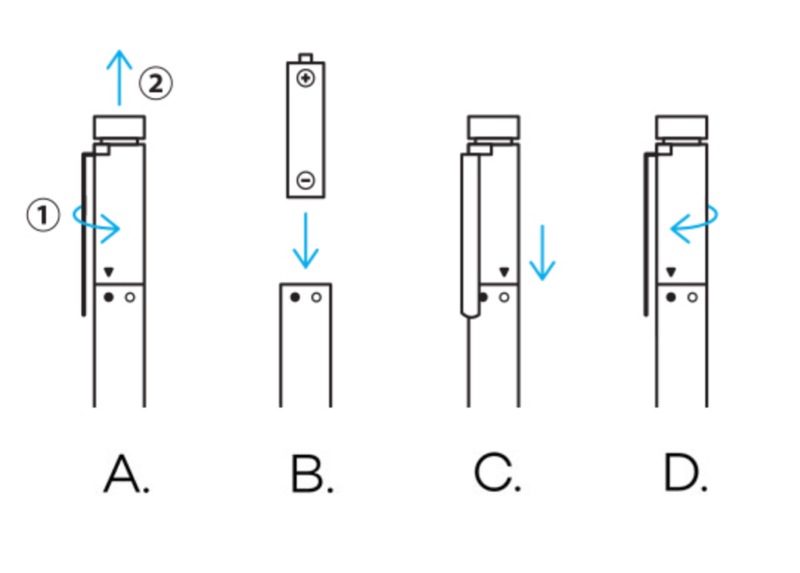
Twist the top end of your Bamboo Ink to unlock it. Open it to insert the battery as indicated, then close and twist the top end to lock it.
Please make sure to install the battery “–” side up.
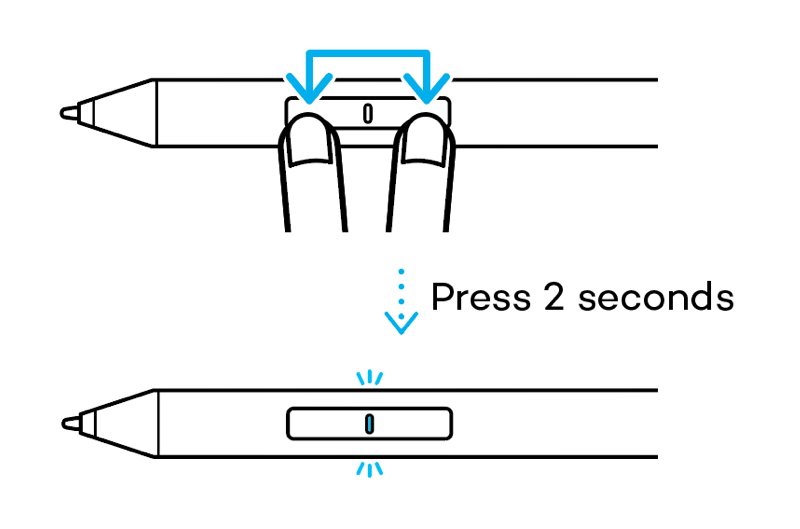
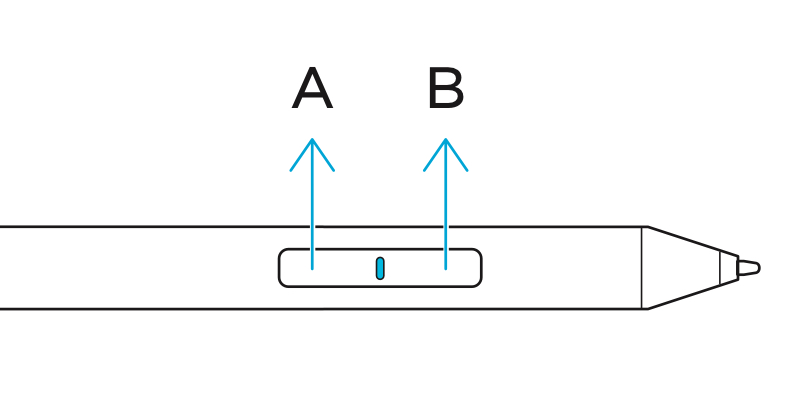
Your Bamboo Ink supports two protocols. The stylus needs to match the protocol of your Windows device. If the stylus does not work on your device, you can easily switch the mode.
Press and hold both side-switches at the same time for two seconds to switch between protocols. Repeat to return to the previous protocol.

To check if your Windows device is compatible with Bamboo Ink, see the list of tested devices on this page.
Some devices require a driver update. To check if your device is one of these, see the below list. If your device is not listed, please continue with step 2. If your device is on this list please click here to download the driver “Bamboo Ink stylus” to your device. Save it on your device, then double click the file to install the driver. Please follow the instructions on screen.
Twist the top end of your Bamboo Ink to unlock it. Open it to insert the battery as indicated, then close and twist the top end to lock it.
Your Bamboo Ink supports two compatibility modes. The mode needs to match the mode of your Windows device. If the stylus does not work on your device, you can easily switch the mode.
Press and hold both side buttons at the same time for two seconds to switch between modes. Repeat to return to the previous mode.
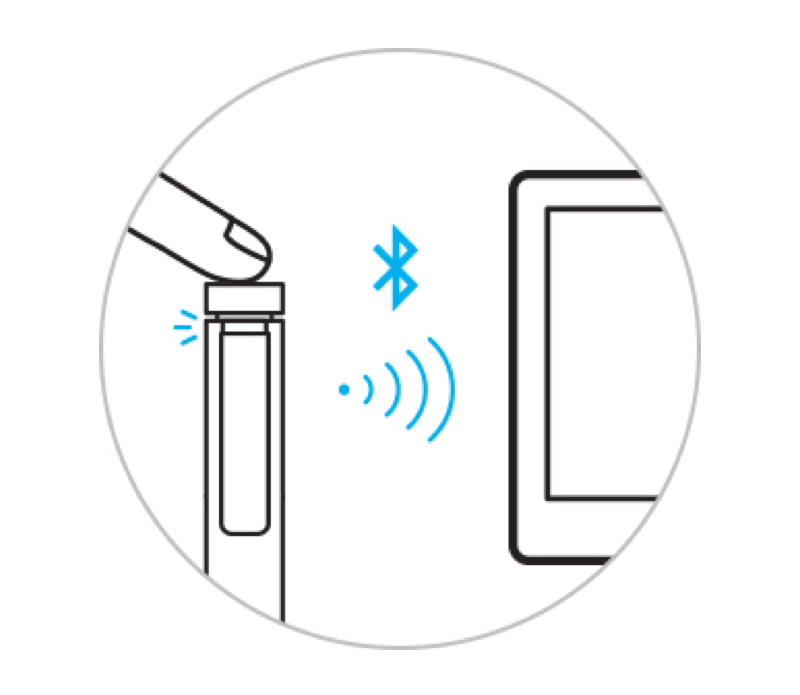
1. On your Windows 10 desktop, click on Start, select Settings, go to Devices, choose Bluetooth, and turn it on.
2. Now take your Bamboo Ink, hold down the top button for about six seconds – until the LED starts to flash.
3. Choose Bamboo Ink from the list of discovered devices and select Pair.

Press the top button once to quickly launch Windows Ink Workspace.
Double-click the top button to open screen sketch.
Press and hold the top button to open Sticky Notes.
Change the default settings at your convenience. Go to Start, select Settings, and then go to Devices and customize what your Bamboo Ink does in Pen & Windows Ink.

Accessories (sold separately): Nib kit – soft, medium and firm – to best suit your way of working.
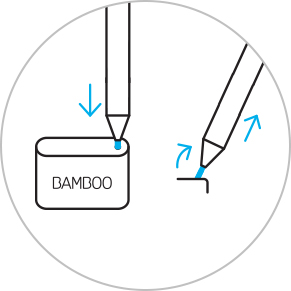
To exchange the current nib, stick it into the small hole in the built-in nib remover of the nib kit. Tilt the stylus and remove the nib.
Slide to open the nib kit and choose from left to right: firm (black), medium (gray) or soft (black).
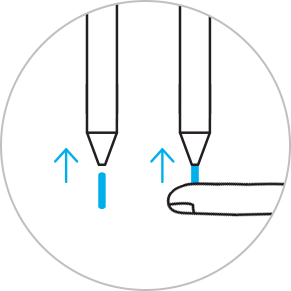
Press up gently to install the nib of your choice. Make sure the nib is resting properly.
Sticky Notes, sketchpad, screen sketch: The Windows Ink Workspace comes with three pre-installed apps that help you set your ideas in motion with your Bamboo Ink.
Bamboo Paper turns your device into a paper notebook. Capture your thoughts and ideas, notes, sketches and drawings as straightforward and easy as in a real paper notebook.
All Wacom products can be safely cleaned with 70 or 75 percent isopropyl alcohol (rubbing alcohol) when applied to a soft lint free cloth. Lightly wipe the moistened cloth on the hard, nonporous surfaces of your Wacom product, such as the display, or other exterior surfaces. Don't use bleach. Avoid getting moisture in any opening, and don't submerge your Wacom product in any cleaning agents. See below for additional tips or please contact your regional Wacom customer service team.
Why not add an accessory kit of three nibs – soft, medium and firm– to change your pen to suit your needs?